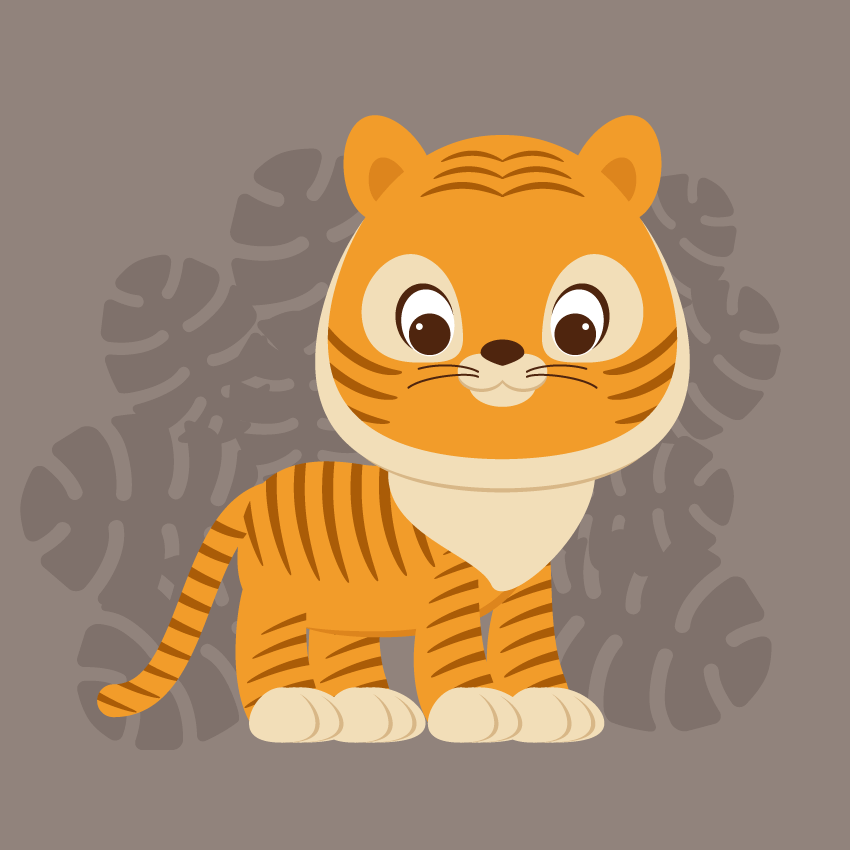
1. How to Create the Tiger’s Head
Step 1
Create a New Document (File > New) with 850 px Width and 850 px Height.
Let’s start with the head. Take the Ellipse Tool (L) and create an orange ellipse that almost resembles a circle. Next, we will apply the Inflate effect to this ellipse. Go to Effect > Warp > Inflate. Enter the options you see below. Expand this shape (Object > Expand Appearance).

Step 2
Let’s add some depth to the head. Create a Copy of this shape in the back of the original one (Control-C, Control-B) and shift it down a little bit. Make this copy slightly bigger and change its color to beige. Select the new shape, make another Copy of it again in the back (Control-C, Control-B), shift it slightly down, and change the color to dark beige.

Step 3
For the ears, let’s start by drawing another ellipse. The Fill color is the same as the head. To use the same color, select the oval, then select the Eyedropper Tool (I) and click on the tiger’s head. The color of the selected object will change to the one you clicked with the Eyedropper Tool (I).
Using the Direct Selection Tool (A), move down the left and right anchor points of the ear. Make another Copy of this shape, change it to a slightly darker color, make it a bit smaller, and place it inside the larger one.

Step 4
Place the ear on the left side of the head. Rotate it a bit to the left. Take the Reflect Tool (O) and while holding down the Alt key, click the forehead. In the new dialogue window, select Vertical, Angle 90 degrees and press Copy. You should now have two ears on the tiger’s head.

Step 5
For the eye, first, create a brown circle. To make an even circle, use the Ellipse Tool (L) while holding down the Shift key. Then create a white oval behind the brown circle and rotate it slightly to the left.
In the image below, this white oval has a black stroke for the tutorial purpose only (for better visibility), so you don’t need this stroke. Make a Copy of the oval in the back, slightly enlarge it, shift it up, and change the color to brown (the same fill color as the pupil).
Finish the eye with a tiny white circle as a highlight. Group the whole eye (right-click > Group), and you’ll thank me later, as it will be more convenient for you in the following steps.

Step 6
Place the eye on the head. Make a reflection of this eye to create the right eye, similar to the steps you took to make the second copy of the ear. You will need to select the whole eye and, using the Reflect Tool (O) while holding down the Alt key, click in the middle of the head. Then check Vertical and press Copy. You should have two eyes now.

Step 7
Let’s add some “tiger-like” features on our tiger. Draw an ellipse on the left side of the head, behind the left eye. To place this beige spot behind the eye, select the eye and place it over the beige spot (Control-X, Control-F). Take the Direct Selection Tool (A) and move the handles of the anchor points to achieve the result you see in the second image. And now, make a reflected vertical copy of this shape and place it behind the right eye.

Step 8
For the nose, create a dark brown ellipse (the same fill color as the pupil) and make a sharp base using the Convert Anchor Point Tool (Shift-C) by clicking on the bottom anchor point.
For the snout, create a beige ellipse behind the nose. Make another Copy of this oval and place it as shown in the image below. Now make the shadow of these beige ellipses: create a slightly larger Copy of these ellipses behind (Control-C, Control-B), make them darker, and move down a little bit. Finally, add another large light brown ellipse below.

Step 9
For the whiskers, we will use the Arc Tool. First, remove the Fill color and set a brown Stroke color. Draw two whiskers on the left side of the snout. Keep the whiskers selected and hit the Reflect Tool (O). Make a vertical reflection as you did before with the ears and eyes.

Place the snout on the head of our tiger.

2. How to Create the Tiger’s Body
Step 1
Let’s create the chest. Using the Ellipse Tool (L), draw an oval. Take the Direct Selection Tool (A) and move the handles of the anchor points to create an upside-down pear-like shape. Place the chest under the head (Control-X, Control-B).

Step 2
Let’s continue creating the body with another orange oval. Deform this oval shape by using the Direct Selection Tool (A). Place the orange shape behind the chest.

Step 3
To draw the legs, start with an oval again (Guess how many times I’ve said “start with an oval”?). First, a large vertical orange oval, and then a smaller horizontal beige oval. Select the left and right anchor points of the smaller oval with the Direct Selection Tool (A), and move them down using the Down Arrow key on the keyboard. Next, move the anchor points of the orange oval to create a shape similar to the image below.

Step 4
Now let’s create the paw. Make a Copy of the beige shape behind, make it darker, and shift it slightly to the right. Make a third Copy of the light brown shape behind and shift it further to the right. Repeat this step twice more: first making a darker copy and slightly shifting to the right, and then shifting the new light brown copy to the right. As a result, you’ll end up with a paw similar to the image below.

Step 5
Give this leg to the tiger. Then make three more copies and give these to him as well. To divide the body from the paws, make a Copy of the body behind and shift it down. Finally, change the Fill color to a darker orange (take the same fill color as the inside part of the ear).

Step 6
For the tail, we will use the Arc Tool again. Do not forget to remove the Fill color, set the orange Stroke color, and check Round Cap on the Stroke panel. Draw a line and deform its shape by adjusting handles. Attach the tail to our predator.
If you like how the tail looks, Expand it (Object > Expand).

3. How to Create the Tiger’s Stripes
Step 1
In this next step, we will add stripes to the tiger’s body.
Draw a thin vertical oval. While keeping it selected, hold down the Alt and Shift keys and move the oval to the right. You will see that you just created a copy of the original oval. Then press Control-D a few times to repeat your last action. Group all the stripes together (right-click > Group) and go to Effect > Warp > Arc. Enter the options you see in the image below.

After this, apply another effect to this group of stripes: go to Effect > Warp > Arc Lower and enter the presented options. Expand the stripes (Object > Expand Appearance). You can make a few copies of this set of stripes, as we will use them later for the body, tail, legs and head as well. Group all the stripes (right-click > Group).

Step 2
Let’s place these stripes on the body. Create a Copy of the orange part of the body in front (Control-C, Control-F), Cut it off (Control-X), and place in front of everything (Control-F).
A little explanation here: when you create a copy in front of the orange body, this copy will appear just in front of the original shape, not in front of the stripes which we created. Then we need to cut off the copy and place it in front of everything, now in front of the orange shape and stripes. Keeping this copy and the stripes selected, press Crop in the Pathfinder panel (Window > Pathfinder).

Step 3
Now we will place stripes on the tail. Just repeat the same actions as you did for the body. Place the stripes on the tail. Make a Copy of the tail in front of everything (Control-C, Control-F and Control-X, Control-F). Keeping the stripes selected and the copy of the tail in front, hit Crop in the Pathfinder panel (Window > Pathfinder).

Step 4
Similarly, place the stripes on all four legs.

Step 5
Now select only three stripes from the created set of stripes. To select just three of them, you first need to Ungroup this set (right-click > Ungroup), select three of them, and Group them back (right-click > Group). Place three stripes from each side of the head and repeat the same action with the Crop button as you have done for the body, tail and legs.

Step 6
Let’s continue to give more stripes to our tiger. Take another three stripes and adjust their sizes and position them as shown in the image below.
Next, make a reflected copy of this set of stripes: right-click your mouse and select Transform > Reflect. In the dialogue box, select Axis Vertical, Angle 90 degrees, and hit Copy. Move this copy to the right until they’re attached.

Place these stripes on the forehead. Our tiger is ready!

4. How to Create the Background
Step 1
Since our predator likes to hunt at night, let’s give it a dark background. Create a grey-violet square behind the tiger, with 850 px Width and Height.

Step 2
Let’s add some leaves from the jungle’s forest. First, add an oval with a color darker than the background. To transform this oval to a leaf, we will use the Eraser Tool (Shift-E). To set the Eraser Tool options, double-click on the Eraser Tool and enter Angle 0 degrees, Roundness 100%, Size 10 pt, and then hit OK.
Now start erasing the parts of the oval from the side to the middle, as shown by the arrows in the image below. Do this on both sides of the oval. The erased lines do not have to be exactly symmetrical. When you are finished with erasing, apply the Round Corners effect: go to Effect > Stylize > Round Corners and select a radius value close to 10 px. Expand this leaf (Object > Expand Appearance).

Step 3
Make many Copies of this leaf, Rotate them in different directions, and resize them to different sizes. Place the created copies behind the tiger and in front of the background.
